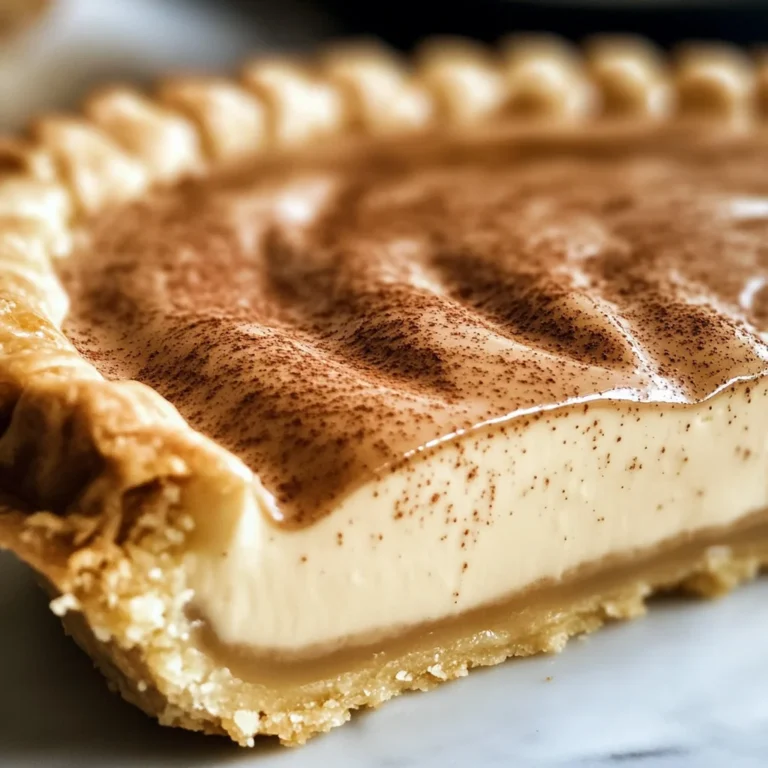
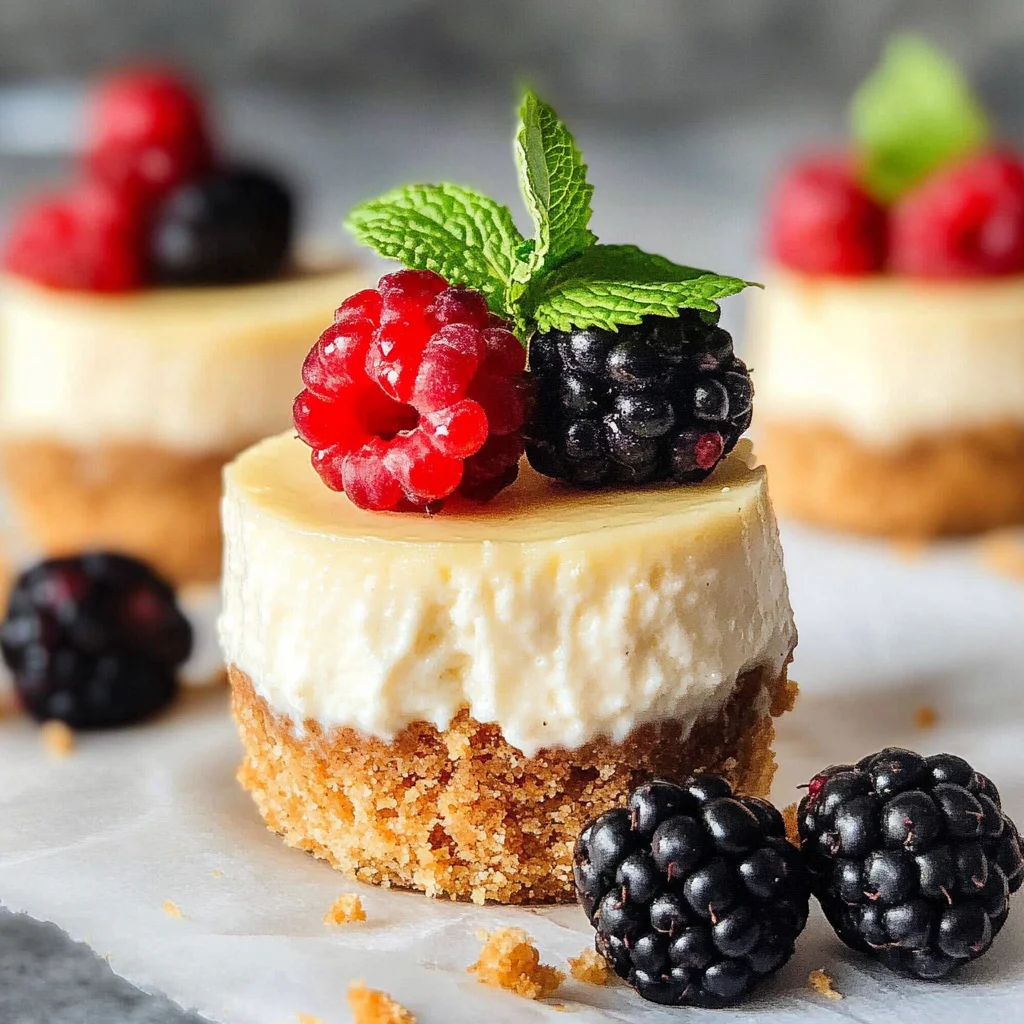
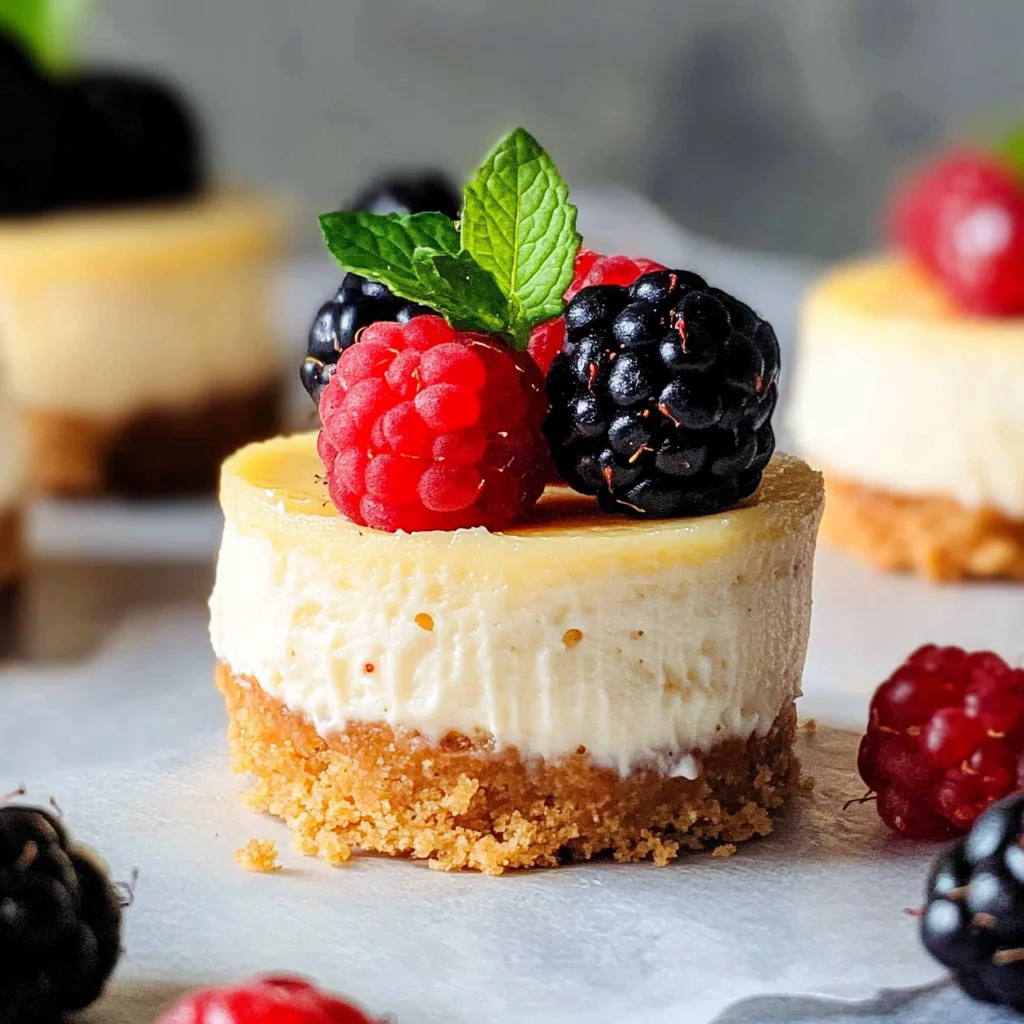
Mini Protein Cheesecakes
These Mini Protein Cheesecakes are a delightful and nutritious dessert option, perfect for any occasion. With over 9 grams of protein per serving, they combine the creamy goodness of Greek yogurt and light cream cheese with a buttery graham cracker crust. Whether you’re hosting a gathering or just treating yourself to something sweet, these cheesecakes offer a healthy twist on a classic favorite.
Why You’ll Love This Recipe
- High in Protein: Each cheesecake contains over 9 grams of protein, making it a satisfying treat that supports your fitness goals.
- Quick and Easy: With just 10 minutes of prep time, you can whip up these cheesecakes quickly.
- Versatile Flavor: Customize your cheesecakes with different toppings like fresh berries or chocolate drizzle.
- Gluten-Free Option: Use gluten-free graham crackers to make this dessert suitable for gluten-sensitive diets.
- Low-Calorie Indulgence: At only 144 calories per cheesecake, you can enjoy a guilt-free dessert.
Tools and Preparation
Before you start making your Mini Protein Cheesecakes, gather your tools and equipment. Having everything ready will streamline the process.
Essential Tools and Equipment
- Food processor
- Cupcake tin
- Mixing bowls
- Handheld electric mixer
- Measuring cups and spoons
Importance of Each Tool
- Food processor: Makes crushing graham crackers fast and easy, ensuring an even crust.
- Cupcake tin: Perfect for portion control; each cheesecake bakes individually for easy serving.
- Handheld electric mixer: Ensures smooth mixing of ingredients, helping achieve the perfect texture.
Ingredients
Here are the ingredients you will need to make these delicious Mini Protein Cheesecakes:
Crust Ingredients
- 1 ½ cups graham cracker crumbs (gluten-free if needed, about 10 sheets)
- 5 Tbsp salted butter (melted)
Filling Ingredients
- 8 oz cream cheese (room temperature, regular or low fat if desired)
- ¾ cup plain 0% Greek yogurt (room temperature)
- ⅓ cup granulated sugar
- 1 egg + 1 yolk
- 1 tsp vanilla extract
- 2 tsp lemon juice
- ¼ – ½ tsp lemon zest (optional for a lemony cheesecake)
- 1 Tbsp arrowroot starch or cornstarch
How to Make Mini Protein Cheesecakes
Step 1: Preheat the Oven
Preheat your oven to 350°F. Line a cupcake tin with 12 liners to prepare for baking.
Step 2: Prepare the Crust
- Add graham crackers to a food processor and pulse until they are fine crumbs.
- Combine melted butter with the crumbs in the processor and pulse until mixed well. Alternatively, use a plastic bag and rolling pin to crush them before mixing in a bowl.
Step 3: Form the Crusts
- Divide the crumb mixture evenly among the muffin liners (about 1.5 tablespoons each).
- Use your fingers to flatten and pack the crumbs at the bottom of each liner.
Step 4: Bake the Crusts
Bake for 5-6 minutes. Remove from oven and allow them to cool for about 5-10 minutes while preparing the filling.
Step 5: Make the Filling
In a large mixing bowl:
1. Beat cream cheese with an electric mixer until smooth.
2. Add Greek yogurt, egg, egg yolk, sugar, vanilla extract, lemon juice, lemon zest, and arrowroot starch. Mix on low speed until combined—avoid overbeating.
Step 6: Bake the Cheesecakes
Divide the filling evenly among the muffin liners. Bake for 17-20 minutes or until set—there should be no jiggle in the center.
Step 7: Cool Down
Allow the cheesecakes to cool at room temperature for about 30 minutes before transferring them to the refrigerator. Chill for at least three hours before serving.
Step 8: Serve
Top with fresh berries and small mint leaves before enjoying your delicious Mini Protein Cheesecakes!
How to Serve Mini Protein Cheesecakes
These mini protein cheesecakes are versatile and can be enjoyed in various delightful ways. Serving them creatively can enhance the overall experience and presentation.
Fresh Berries Topping
- Top each cheesecake with an assortment of fresh berries like strawberries, blueberries, or raspberries for a pop of color and flavor.
Mint Leaves Garnish
- Add small mint leaves on top of the cheesecakes for an aromatic touch that also enhances the visual appeal.
Whipped Cream
- Serve with a dollop of whipped cream made from coconut cream or whipped topping for added richness and sweetness.
Drizzle of Honey
- A light drizzle of honey over each cheesecake adds a natural sweetness that complements the tartness of the filling.
Chocolate Sauce
- Pour a thin layer of chocolate sauce over the cheesecakes for chocolate lovers wanting an extra indulgent treat.
Fruit Compote
- Spoon homemade fruit compote made from your favorite fruits as a delicious sauce that pairs well with the cheesecake’s creamy texture.
How to Perfect Mini Protein Cheesecakes
To achieve the best results with your mini protein cheesecakes, follow these helpful tips.
-
Use Room Temperature Ingredients: Bringing your cream cheese and Greek yogurt to room temperature ensures a smoother batter without lumps.
-
Do Not Overmix: Mix until just combined to avoid incorporating too much air, which can lead to cracks during baking.
-
Monitor Baking Time: Keep a close eye on the baking time; removing them when they are just set will ensure a creamy texture.
-
Cool Gradually: Allowing the cheesecakes to cool at room temperature before refrigerating helps prevent condensation and sogginess.
-
Chill Properly: Refrigerate for at least three hours to allow the flavors to meld and achieve the perfect firmness.
Best Side Dishes for Mini Protein Cheesecakes
Pairing side dishes with mini protein cheesecakes can elevate your dessert experience. Here are some great options:
-
Fruit Salad: A refreshing mix of seasonal fruits provides a light contrast to the richness of the cheesecakes.
-
Yogurt Parfait: Layer yogurt with granola and fresh fruits for a nutritious accompaniment that mirrors the flavors in the cheesecake.
-
Nut Butter Dip: Serve with almond or peanut butter as a dip for added protein and creaminess alongside each cheesecake slice.
-
Coconut Chia Pudding: This creamy, nutrient-rich pudding offers a delightful texture that complements the cheesecakes beautifully.
-
Granola Bars: Homemade or store-bought granola bars can add a crunchy element that contrasts with the soft cheesecake texture.
-
Vegetable Crudités: A platter of fresh vegetables served with hummus provides a savory balance to your sweet dessert spread.
-
Dark Chocolate Covered Almonds: These treats add richness and crunch while offering healthy fats to round out your dessert experience.
-
Matcha Tea: A cup of matcha tea serves as an elegant beverage choice that pairs well with sweet desserts while providing health benefits.
Common Mistakes to Avoid
When making Mini Protein Cheesecakes, it’s easy to make a few common mistakes that can affect the outcome. Here are some tips to help you avoid them.
-
Skipping room temperature ingredients: Using cold cream cheese or yogurt can lead to lumps in your filling. Always allow these ingredients to reach room temperature before mixing.
-
Overmixing the filling: Mixing too aggressively can incorporate too much air, causing your cheesecakes to puff up and crack. Mix just until smooth for the best texture.
-
Not pre-baking the crust: Failing to bake the crust before adding the filling can result in a soggy base. Always bake it for 5-6 minutes before adding the cheesecake mix.
-
Ignoring baking time: Overbaking can dry out your Mini Protein Cheesecakes. Keep an eye on them and remove them when they just set but aren’t jiggly.
-
Skipping cooling time: Letting them cool at room temperature before refrigerating helps maintain their texture. Don’t rush this step for better results.
Storage & Reheating Instructions
Refrigerator Storage
- Store in an airtight container.
- They can last up to 5 days in the refrigerator.
Freezing Mini Protein Cheesecakes
- Wrap each cheesecake individually in plastic wrap.
- Store in a freezer-safe container for up to 2 months.
Reheating Mini Protein Cheesecakes
- Oven: Preheat to 350°F and heat for about 10 minutes until warm.
- Microwave: Heat on low power for 15-20 seconds until just warmed through.
- Stovetop: Place in a covered pan over low heat for a few minutes, checking frequently.
Frequently Asked Questions
Here are some common questions about Mini Protein Cheesecakes that might help you out.
Can I use non-dairy alternatives in Mini Protein Cheesecakes?
Yes, you can substitute cream cheese and yogurt with non-dairy options like cashew cream or almond yogurt for a vegan version.
How do I make Mini Protein Cheesecakes gluten-free?
To make these cheesecakes gluten-free, simply use gluten-free graham crackers or another suitable alternative for the crust.
What is the protein content in Mini Protein Cheesecakes?
Each serving contains over 9 grams of protein, making it a healthy dessert option.
Can I customize the flavor of my Mini Protein Cheesecakes?
Absolutely! Feel free to add different flavors such as chocolate, peanut butter, or fruit purees to customize your cheesecakes.
How long do Mini Protein Cheesecakes need to chill?
It’s best to chill them for at least 3 hours after baking for optimal texture and flavor development.
Final Thoughts
These Mini Protein Cheesecakes are not only delicious but also a healthy dessert option packed with protein. Their creamy texture and customizable flavors make them perfect for any occasion. Try adding your favorite toppings or mixing in different flavors to suit your taste!
Mini Protein Cheesecakes

Indulge in the delightful taste of Mini Protein Cheesecakes, a healthy and satisfying dessert packed with over 9 grams of protein per serving. These charming mini treats blend the creamy richness of Greek yogurt and light cream cheese with a buttery graham cracker crust, making them perfect for any occasion—from casual snacking to festive gatherings. With their low-calorie count of just 144 calories each, you can treat yourself without the guilt.
- Prep Time: 10 minutes
- Cook Time: 20 minutes
- Total Time: 30 minutes
- Yield: Makes 12 servings 1x
- Category: Dessert
- Method: Baking
- Cuisine: American
Ingredients
- 1 ½ cups graham cracker crumbs (gluten-free if needed)
- 5 Tbsp salted butter (melted)
- 8 oz cream cheese (room temperature)
- ¾ cup plain 0% Greek yogurt (room temperature)
- ⅓ cup granulated sugar
- 1 egg + 1 yolk
- 1 tsp vanilla extract
- 2 tsp lemon juice
- 1 Tbsp arrowroot starch or cornstarch
Instructions
- Preheat oven to 350°F and line a cupcake tin with liners.
- In a food processor, pulse graham crackers into fine crumbs, then mix in melted butter.
- Divide crumb mixture evenly among muffin liners and pack down to form crusts.
- Bake crusts for 5-6 minutes; allow to cool slightly.
- In a mixing bowl, blend cream cheese until smooth; add Greek yogurt, egg, sugar, vanilla extract, lemon juice, and starch. Mix until combined.
- Pour filling into cooled crusts; bake for 17-20 minutes until set.
- Cool at room temperature for about 30 minutes before chilling in the fridge for at least three hours.
Nutrition
- Serving Size: 1 cheesecake
- Calories: 144
- Sugar: 8g
- Sodium: 90mg
- Fat: 8g
- Saturated Fat: 4g
- Unsaturated Fat: 4g
- Trans Fat: 0g
- Carbohydrates: 15g
- Fiber: <1g
- Protein: 9g
- Cholesterol: 40mg