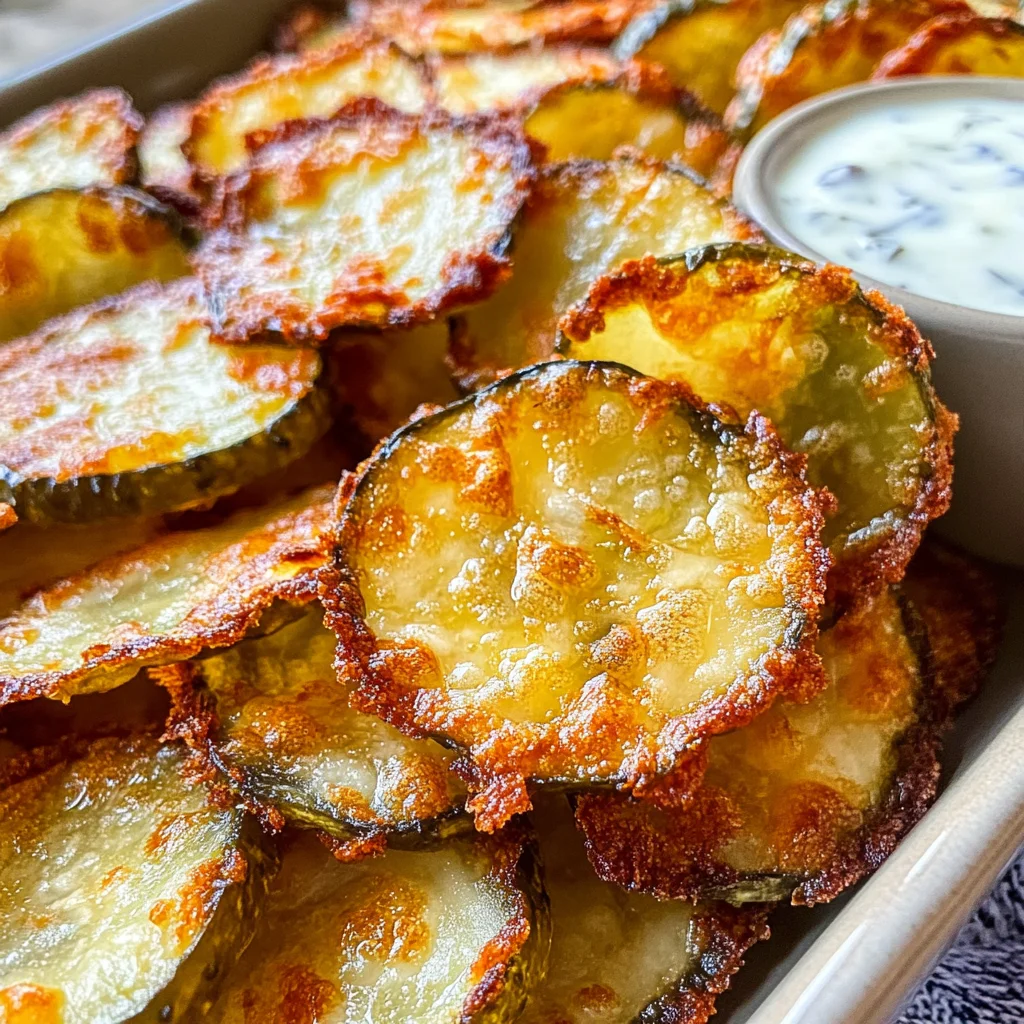
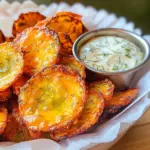
Crispy Cheesy Dill Pickle Chips
If you’re a fan of crispy snacks, you’ll love these Crispy Cheesy Dill Pickle Chips! Perfect for game day, movie nights, or casual gatherings, these cheesy bites are not only delicious but incredibly easy to make. With a delightful crunch and a burst of flavor from the dill pickles, they are sure to be a hit with family and friends alike.
Why You’ll Love This Recipe
- Quick Preparation: These crispy chips come together in just 25 minutes, making them an ideal snack for any occasion.
- Crowd-Pleaser: Whether it’s a party or a quiet movie night at home, everyone will enjoy these cheesy delights.
- Customizable Flavor: Feel free to experiment with different seasonings according to your taste preferences.
- Low Carb Option: These pickle chips are perfect for those looking for a low-carb snack without sacrificing flavor.
- Easy Cleanup: Using a muffin tin makes for easy portioning and cleanup after cooking.
Tools and Preparation
To make the process smooth and enjoyable, having the right tools is essential. Here’s what you need to prepare your Crispy Cheesy Dill Pickle Chips.
Essential Tools and Equipment
- Non-stick muffin tin
- Cooking spray
- Paper towels
- Oven
Importance of Each Tool
- Non-stick muffin tin: Ensures that your cheesy pickle chips release easily after baking without sticking.
- Cooking spray: Helps to further prevent sticking and promotes even browning on the cheese.
- Paper towels: Useful for patting dry the dill pickle chips, which helps achieve maximum crispiness.
- Oven: The main appliance that bakes your delicious crispy chips to perfection.
Ingredients
To create these delightful Crispy Cheesy Dill Pickle Chips, gather the following ingredients:
For the Cheese Cups
- 2 cups Shredded Cheese (I used Colby Jack)
For the Pickle Chips
- 24 – 36 Dill Pickle Chips (as needed)
For Seasoning
- 1 tbsp. Blackening Seasoning
How to Make Crispy Cheesy Dill Pickle Chips
Step 1: Preheat the Oven
Preheat your oven to 400°F. While it heats up, take your dill pickle chips and pat them dry on a few paper towels. This step is crucial for achieving that crispy texture.
Step 2: Prepare the Muffin Tin
Grab a non-stick 12-cup muffin tin. If desired, spray each cup with non-stick cooking spray. Fill each cup with a generous pinch of shredded cheese.
Step 3: Add Pickles and More Cheese
Top each cheese cup with two or three dill pickle chips. Then sprinkle your favorite seasoning blend over the pickles, followed by another layer of cheese to cover them completely.
Step 4: Bake Until Golden Brown
Bake in the preheated oven for about 15 minutes or until the cheese has melted and turned golden brown.
Step 5: Optional Crisping in Air Fryer
For extra crunch, remove each cheesy pickle chip from the muffin tin and place them in an air fryer at 400°F for an additional 5 minutes.
Step 6: Serve Warm
Serve immediately with your favorite dipping sauce. These crispy bites pair wonderfully with ranch dressing or my Tangy Alabama White Sauce. Enjoy!
How to Serve Crispy Cheesy Dill Pickle Chips
Crispy Cheesy Dill Pickle Chips are a delightful snack that can be enjoyed in various ways. Whether at a party, game day, or just a cozy night in, these cheesy bites can elevate any occasion.
Pair with Dipping Sauces
- Ranch Dressing: A classic choice that enhances the cheesy and tangy flavor of the chips.
- Tangy Alabama White Sauce: This creamy sauce adds a unique twist that complements the pickles perfectly.
- Spicy Ketchup: For those who crave a little heat, spicy ketchup provides an exciting kick.
Include in Snack Platters
- Veggie Sticks: Carrots, celery, and bell peppers add freshness and crunch to your platter.
- Cheese Cubes: Pair with assorted cheeses for a rich, savory experience.
- Olives: A mix of green and black olives gives a briny contrast to the pickles.
Make it a Meal
- Serve with Grilled Chicken: These pickle chips make an excellent side for grilled chicken dishes.
- Add to Burgers: Use them as a topping on your favorite burger for extra flavor.
How to Perfect Crispy Cheesy Dill Pickle Chips
To ensure your Crispy Cheesy Dill Pickle Chips turn out perfectly every time, follow these helpful tips.
- Use Dry Pickles: Patting the dill pickle chips dry helps prevent excess moisture, ensuring crispiness.
- Choose Quality Cheese: Opt for a good melting cheese like Colby Jack or Monterey Jack for the best flavor and texture.
- Adjust Baking Time: Keep an eye on your chips while baking; every oven is different, so adjust cooking time as needed.
- Consider Air Frying: For added crispiness, air fry the baked chips briefly after baking. This step takes them to the next level!
- Experiment with Seasonings: Don’t hesitate to try different seasoning blends based on your preference, such as garlic powder or paprika.
Best Side Dishes for Crispy Cheesy Dill Pickle Chips
Crispy Cheesy Dill Pickle Chips pair wonderfully with several side dishes. Here’s a list of delicious options to consider:
- Coleslaw: A creamy coleslaw brings a refreshing crunch that complements the chips’ flavors.
- Potato Wedges: Baked or fried potato wedges add heartiness and are perfect for dipping alongside the chips.
- Stuffed Jalapeños: These spicy bites provide an exciting contrast to the cheesy pickles.
- Macaroni Salad: A cold macaroni salad offers creaminess and tang that pairs well with crispy snacks.
- Corn on the Cob: Grilled corn adds a sweet element that balances out the saltiness of the chips.
- Quinoa Salad: Light and nutritious, this salad provides texture while being a healthy option alongside your cheesy treat.
Common Mistakes to Avoid
When making Crispy Cheesy Dill Pickle Chips, it’s easy to overlook a few important details. Here are some common mistakes to avoid:
-
Not Patting Dry the Pickles: Failing to dry your dill pickle chips can result in soggy snacks. Always pat them dry with paper towels before cooking.
-
Overfilling Muffin Tin: Adding too much cheese or too many pickles can cause overflowing during baking. Stick to the recommended amounts for perfect results.
-
Skipping Seasoning: Neglecting to add seasoning will make your chips bland. Be generous with your favorite spice blend for an extra kick of flavor.
-
Ignoring Baking Time: Underbaking will leave the cheese chewy instead of crispy. Keep an eye on your chips and bake until golden brown for that perfect crispiness.
-
Not Using a Non-Stick Spray: If you skip the non-stick spray, you risk the chips sticking to the muffin tin. A light spray ensures easy removal post-baking.

Storage & Reheating Instructions
Refrigerator Storage
- Store leftover Crispy Cheesy Dill Pickle Chips in an airtight container.
- They are best consumed within 2-3 days for optimal freshness.
Freezing Crispy Cheesy Dill Pickle Chips
- Place cooled chips in a single layer on a baking sheet and freeze until solid.
- Transfer to a freezer-safe bag or container for up to 1 month.
Reheating Crispy Cheesy Dill Pickle Chips
- Oven: Preheat to 350°F (175°C). Bake for about 10 minutes until heated through and crispy again.
- Microwave: Heat on medium power for about 30 seconds, but this may not restore crispiness.
- Stovetop: Reheat in a non-stick skillet over low heat until warmed through, flipping occasionally.
Frequently Asked Questions
Here are some common questions about making Crispy Cheesy Dill Pickle Chips:
How can I customize my Crispy Cheesy Dill Pickle Chips?
You can customize by using different types of cheese or adding spices like cayenne pepper or garlic powder for extra flavor.
Can I use other pickles instead of dill?
Yes, feel free to experiment with other pickle varieties such as bread and butter or spicy pickles based on your taste preference.
Are Crispy Cheesy Dill Pickle Chips gluten-free?
Absolutely! As long as you use gluten-free seasoning, this recipe is naturally gluten-free.
What dipping sauces go well with these chips?
These cheesy pickle chips pair wonderfully with ranch dressing, yogurt-based dips, and tangy sauces like Alabama White Sauce.
Final Thoughts
Crispy Cheesy Dill Pickle Chips are a delightful snack that everyone will love. Their crunchy texture combined with cheesy goodness makes them perfect for gatherings or as an everyday treat. Feel free to customize them with different cheeses and seasonings to suit your taste!
Crispy Cheesy Dill Pickle Chips
Crispy Cheesy Dill Pickle Chips are the ultimate savory snack that combines irresistible crunch with cheesy goodness. Perfect for game day, movie nights, or casual gatherings, these delightful bites are simple to make and sure to impress. In just 25 minutes, you’ll have a delicious treat that everyone will love. Customize the flavor with your favorite seasonings and serve them warm with tangy dipping sauces like ranch dressing or Alabama white sauce. These low-carb snacks are not only quick to prepare but also easy to clean up, making them an excellent choice for any occasion.
- Prep Time: 10 minutes
- Cook Time: 15 minutes
- Total Time: 25 minutes
- Yield: Approximately 12 servings 1x
- Category: Snack
- Method: Baking
- Cuisine: American
Ingredients
- 2 cups shredded cheese (Colby Jack recommended)
- 24–36 dill pickle chips
- 1 tablespoon blackening seasoning
Instructions
- Preheat your oven to 400°F (200°C). Pat the dill pickle chips dry with paper towels.
- Lightly spray a non-stick muffin tin and fill each cup with a generous pinch of shredded cheese.
- Place two or three dill pickle chips on top of the cheese in each cup and add more cheese to cover.
- Bake for approximately 15 minutes until the cheese is melted and golden brown.
- For extra crispiness, air fry the baked chips at 400°F (200°C) for an additional 5 minutes if desired.
- Serve warm with your favorite dipping sauce.
Nutrition
- Serving Size: 2 chips (30g)
- Calories: 150
- Sugar: 0g
- Sodium: 350mg
- Fat: 12g
- Saturated Fat: 7g
- Unsaturated Fat: 4g
- Trans Fat: 0g
- Carbohydrates: 2g
- Fiber: 0g
- Protein: 10g
- Cholesterol: 30mg